**Foreword**
The first step in installing an operating system via a USB drive is to set the USB as the primary boot device. But how exactly do you configure your BIOS to prioritize booting from a USB stick? Using a USB drive for system installation has become one of the most convenient and widely used methods, allowing users to install an OS anytime, anywhere—just with a single USB drive. However, when using a USB drive to install an OS, it’s usually necessary to access the BIOS settings and adjust the boot order so that the USB is selected as the first boot option. Many users are still unsure about how to do this, so here's a detailed guide on how to enter the BIOS and set the USB as the primary boot device.
**Step-by-step Guide to Setting USB as First Boot in BIOS**
1. **Power on your computer and enter BIOS:**
When the startup screen appears, press the key that opens the BIOS setup. This key varies depending on the manufacturer—common keys include **Esc**, **Delete**, **F2**, or **F6**. If you're unsure, try pressing these keys repeatedly during startup.
2. **Navigate to the Boot Settings:**
Once inside the BIOS, look for a section labeled **"Boot"** or **"Boot Setup."** Here, you'll find the boot order options. You need to set your USB drive as the top priority. The USB drive might be listed as **USB-HDD**, **USB-FDD**, **USB-ZIP**, or **USB-CD-ROM**, depending on how you created the bootable USB.
3. **Change the Boot Order:**
Use the **Page Up** or **Page Down** keys to cycle through the boot options. Move the USB drive entry to the top of the list. This tells the computer to attempt to boot from the USB before any other devices.
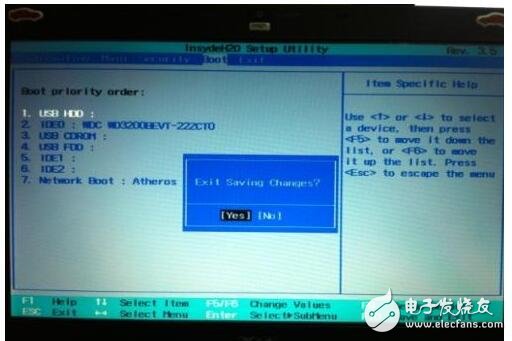
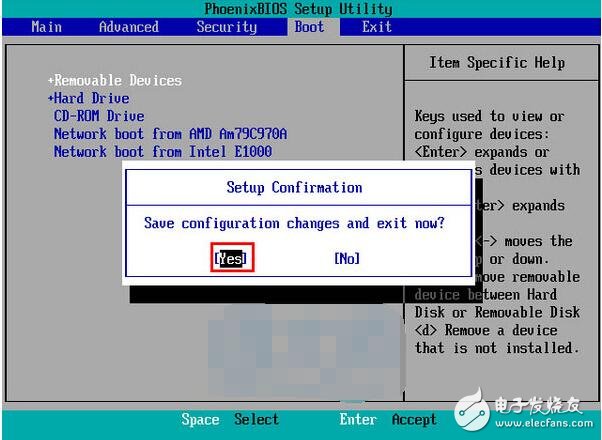
4. **Save and Exit:**
After adjusting the boot order, press **F10** (or **ESC** if prompted) to save your changes and exit the BIOS. Your computer will then restart, and if everything is set correctly, it should boot from the USB drive.
5. **Insert the Bootable USB and Restart:**
Make sure the bootable USB drive is properly inserted into a USB port. For desktop computers, it's recommended to use the rear USB ports for better stability. Then, restart your computer. It should now load the USB boot menu, allowing you to proceed with the OS installation.
**How to Enter BIOS and Set USB as Boot Device**
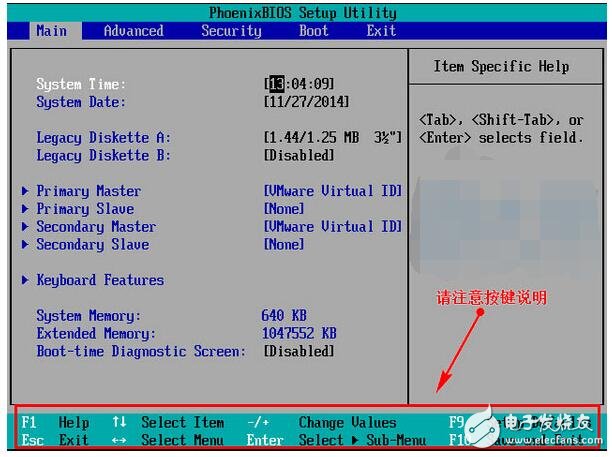
After connecting the bootable USB drive to your computer, restart the system. As the boot screen appears, press the correct key to enter the BIOS settings. Different manufacturers have different keys, so be careful not to confuse the BIOS key with other shortcuts like the U盘 startup shortcut.
Once inside the BIOS interface, take a moment to understand the layout. The **arrow keys** can be used to navigate, **Enter** confirms selections, and **F10** saves and exits the BIOS.
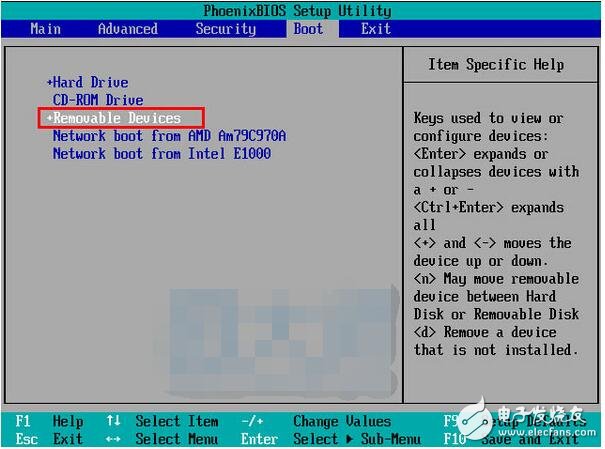
Next, move the cursor to the **"Boot"** tab and locate the USB drive entry. Depending on your system, it may appear as **"Removable Device"**, **"USB HDD"**, or similar. This is where the bootable USB is recognized by the BIOS.
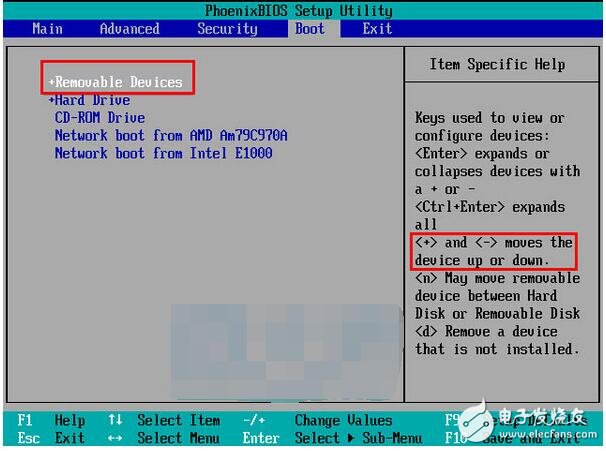
Now, use the **"+" key** (or the arrow keys) to move the USB entry to the top of the boot order. This ensures the system will boot from the USB drive first.
Once the setting is complete, press **F10** to save and exit. A confirmation prompt will appear—press **Enter** to confirm. After restarting, your system should now boot from the USB drive.
This is how you set your USB drive as the first boot device in the BIOS. If you're still unsure, don't worry—this process is quite straightforward once you get the hang of it. In the next part, we’ll go over how to do this on different computer brands, making it even easier for everyone to follow.
48V30Ah Lithium Ion Battery,Long Cycle Life 48V 30Ah Battery,48V 30Ah Battery For Vehicle,Deep Cycle Life Battery
Jiangsu Zhitai New Energy Technology Co.,Ltd , https://www.zttall.com