Many users have faced issues with wireless bridging on their routers. This is a common problem that has been discussed multiple times before. In this article, I will explain the advantages of using wireless bridging and how it can help expand your WiFi coverage. The main purpose of wireless bridging is to extend the range of your WiFi signal, allowing you to enjoy internet access in areas where the original signal might be weak or nonexistent. This eliminates the need for physical wiring and makes it easier to set up a fully covered network.

To give you a better understanding, I'll use Tenda routers as an example to walk you through the process of setting up a wireless bridge between two routers. We’ll cover both hotspot signal amplification mode (WISP) and universal relay mode (Client+AP), explaining which one suits different scenarios.

First, you need two routers. One acts as the main router, usually connected to the modem or broadband cable, while the other is the secondary router used for bridging. The main router provides the initial internet connection, and the secondary one extends the WiFi signal.
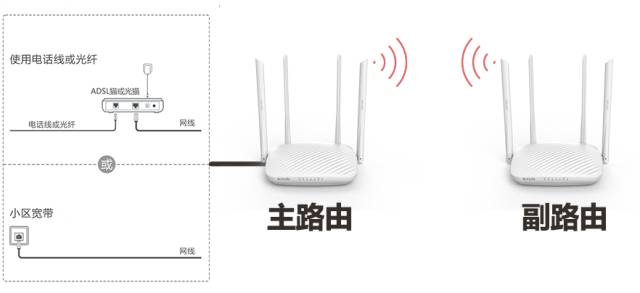
The first step is to configure the main router. Ensure it’s properly connected to the internet. Most of the time, it’s already working fine, so no special setup is needed. However, you should note down the WiFi name and password of the main router—let's say it's "Tenda_A" with the password "12345678000."
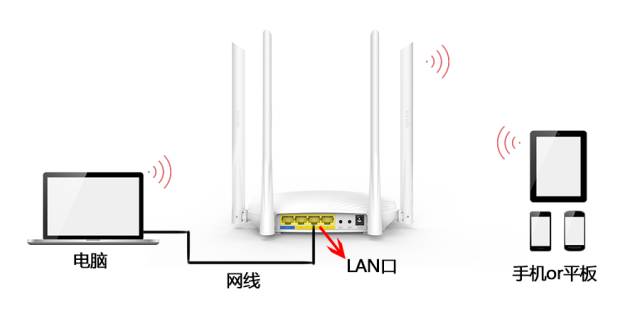
Next, move on to setting up the secondary router. Connect your computer via an Ethernet cable to one of its LAN ports, or connect via WiFi using a phone, tablet, or laptop.
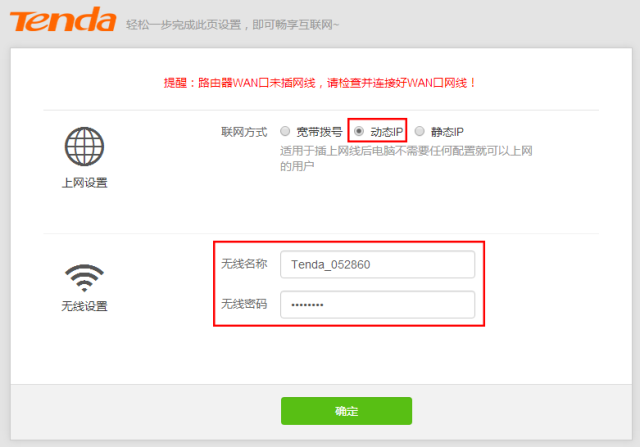
Open a browser and type in the management IP address, typically "192.168.0.1." If it's the first time you're setting it up, you'll see a default interface. From there, choose "Dynamic IP," change the wireless name and password, then click OK.
Then go to the "Internet Settings" section and select either "Hotspot Signal Amplification Mode (WISP)" or "Universal Relay Mode (Client+AP)." Choose based on your specific needs. WISP mode is ideal for extending a single WiFi signal, while Client+AP allows the secondary router to act as both a client and an access point.
After selecting the appropriate mode, search for the main router's WiFi signal (e.g., "Tenda_A"), enter the password, and click "Connect." The secondary router will restart automatically.
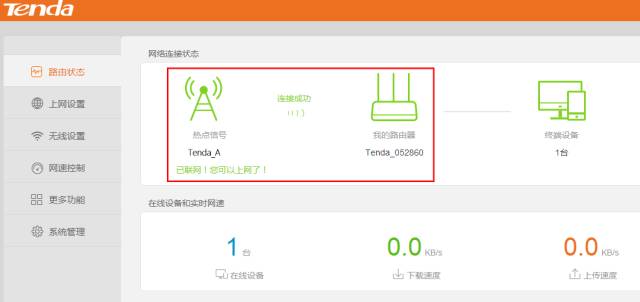
Once the connection is successful, the secondary router is now bridged with the primary one. You can check the status to confirm the setup was completed correctly.
Tips:
1. When using WISP mode, the secondary router will check for IP conflicts after restarting. If there’s a conflict, just click OK. If not, make sure the IP addresses of the primary and secondary routers are in different subnets. For example, if the primary is at 192.168.0.1, the secondary should be at 192.168.X.1 (where X is between 1 and 254).
2. In Client+AP mode, the secondary router’s LAN IP will automatically fall into the same network segment as the primary router. It cannot be changed, and devices connected to the secondary will get IP addresses from the primary router.
While WiFi is convenient, its signal doesn’t travel far and struggles to penetrate walls. Proper placement is key—choose a central location, avoid sealed walls, and consider outdoor placement if possible. If coverage remains an issue, using one or more routers to create a wireless relay can effectively extend your signal to the areas you need most.
Micro Led Display,Micro led digital signage,Mini led display wall,Micro led display video wall,TV Studio led display,fine pixel pitch led screen
Shenzhen Xinfei Century Technology Co., Ltd. , https://www.rgbdancing.com