The road to customization of my keyboard was quite unexpected. I remember that my Razer Black Widow mechanical axis was broken and I wouldn't repair it. I went to the store to look for a master, and as a result, the master used a soldering iron to make a few simple adjustments. "30," I was a bit silly at the time, and I would charge 30 yuan for two electric irons.
I rushed out after I thought about it. I would like to find them if I would like to buy a soldering iron and solder it myself! A look at the Internet, a set of equipment was only 20 yuan, I was much silly to find a physical store.
Because my own hands-on ability is also good, then I have to repair their own keyboard, easy and comfortable, but always itchy, always feel unsatisfied. Accidentally saw a customized mechanical keyboard on the Internet. Isn't that what I want? Just for myself, I also need a keyboard, and I will do my job on the Internet.
For the first time, the parts are all cheaper, the black axis of the G-axis, because I want to play games, single hand speed or black shaft stable point, minimalist shell and gh60 BFACE PCB, POKE2 sequence, bottom lights RGB adjustable , white no keycap, ice blue round light. OK, everything is ready and start working on it.

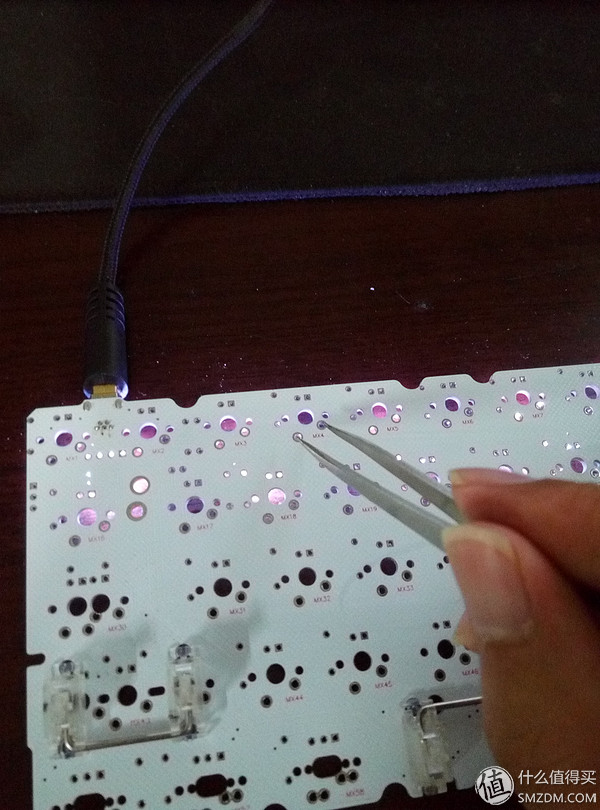
1, test PCB
Testing the PCB is a very important step, because if there is no test, once there is a problem later, it is difficult to find where the problem is. There are keyboard test softwares now. I just downloaded a random one on the Internet, called jfsky.com-keyboardtest, which is still very easy to use. Use a tweezers to hold the hole in the shaft of the mechanical shaft to test.
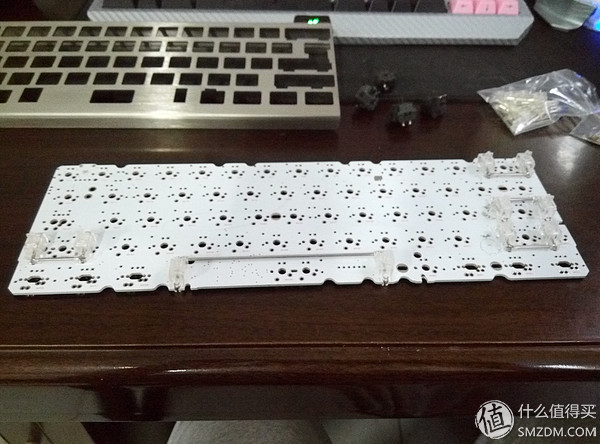
2, install the satellite shaft
In this step, you don’t look very simple. In fact, the knowledge is also old. The installation of the satellite shaft directly determines the feel of the keyboard after several large keys. If there is no meat, it is a problem with your satellite shaft. First, before installation, you need to use a metal rod to expand the installation shaft hole of the satellite shaft. Then, after installing, turn the PCB upside down to see if the shaft of the satellite shaft can fall naturally. If not, you need to adjust the metal rod again. s position.
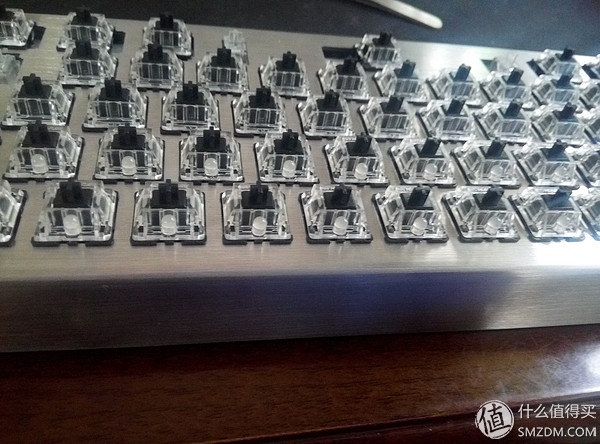
3, install the mechanical axis
When installing the shaft, it is quite simple, and the direction of the shaft is good. For the position of the PCB shaft, the shaft body is stuck on the positioning plate one by one. Pay attention to whether the axis of each axis is vertical. If you do not need to adjust the vertical axis, the PCB will be pressed under the board when the PCB is mounted.
4, install the PCB
Turn the positioning plate over, and the PCB aligns the chrysanthemum on the axis body and the axle foot, and press the positioning plate with force and hear a snap. OK, it is already fit. Then touch the shaft feet one by one by hand to make sure nothing is lost, or wait until you have soldered and found that there are no holes in the feet. You can die!
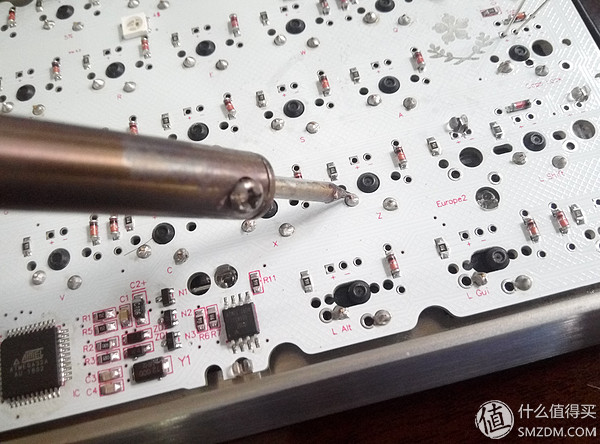
5, welding shaft
Finally arrived at my strengths, welding is like chopping for me, electric iron heating, ready for solder and rosin, smoke open welding. Take a look at this welding quality, the absolute cone type. Since the soldering iron and solder cannot be photographed in the hand, the soldering process is indicated.
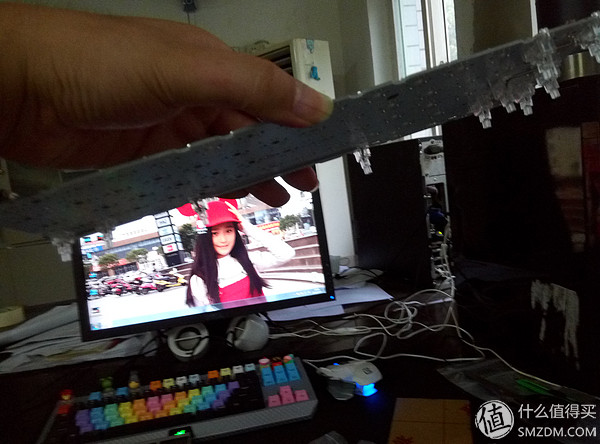
6, welding round light
It's still the same, but it's quick to weld, but the lamp's lamp foot needs to be preceded by a crucible to prevent the light from falling off during welding, so that one foot is welded first and then the other foot is welded straight. Welding was found to have been pitted, and the last three buttons had negative and positive poles. I was dizzy, and I used a soldering iron and soldering iron to make a toss. Finally I finally got it.

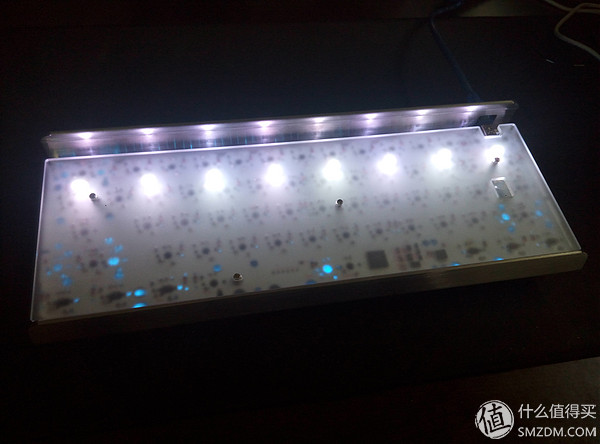
7, after the installation of positioning board
After welding, cut the lamp foot, install the Yagri positioning plate behind the PCB, and tighten the screw. OK!
Power up to see the effect!
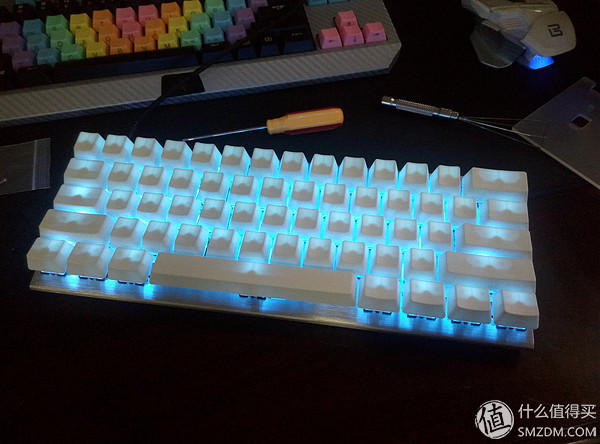
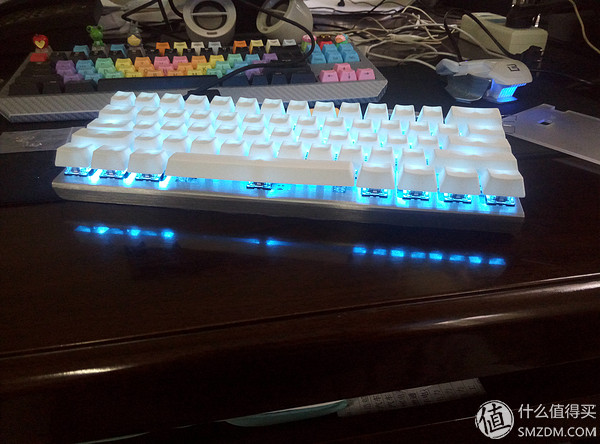
Haha, it's still good, feels sly, sly, oh. To say that the problem is that this RGB bottom light also has to install the operating software, a bit troublesome. There are no white keycaps that really look pretty, but when you enter numbers, it's a bit of a heartbeat!
Like GH60 customized friends, are interested in the next discussion!